Sunday, January 30, 2011

Pineapple Teriyaki Swiss Burgers

Finished Product
This is one of my favorite quick and easy burger recipes. The beautiful thing about these is the fragrance, the presentation, and of course the delicious taste. And no, you do not need to wait for summer to make these. In fact, in a some what cruel and unusual punishment sort of way, I find that the best time to make these is in the middle of January late at night. This way the thermal layers are just right so that the BBQ teriyaki smell gets trapped and the decadent fragrance permeates the entire neighborhood. Talk about messing with the neighbor’s stomachs at 9:00 PM when they are trying to go to bed.

Years upon years ago, I did this for the first time after a late night at work not fully realizing the time. In hind-sight I must have gotten home just after midnight and fired up the grill around 1:00 AM.  By 1:30 AM as I was eating in the quite darkness of the back yard, I noticed kitchen lights flick on in nearly every house in the neighborhood.  Poor things, they were up scouring around their kitchens like little errant mice trying to find something to eat, something to curb their sudden deep thirst for BBQ, without any real knowledge to why they were suddenly so hungry.

Yeah I know it is mean.  But there is something about a nice hot teriyaki burger in the late evening. Now before you get started a few rules of the game.  If you can see through your teriyaki sauce, it is not a sauce but flavored water. If it is not as thick as honey, then it is just flavored water. Now I realize that everyone’s tastes are different, so go hunting for a teriyaki sauce that you like. Try it as a dipping sauce with some chicken or Chinese take out first.  If it is good, then use it else where in your cooking.  Cooking is 30% raw materials, 40% recipe, and 30% technique.  If you do not have good raw ingredients, it will not taste good.

Now one of the readily available commercial sauces I like is the Kikkoman, Terriyaki Sauce from their Takumi Collection.  It has a purplish label and is pretty good, though not wonderful.

Ingredients (2 burgers)

  • 1/2 lb of 80/20 hamburger (no fat, no flavor)
  • 30 ml of Teriyaki sauce (to be mixed in)
  • 30 ml of Teriyaki sauce (to be put on afterwards)
  • 3 grams of Lawry’s seasoned salt
  • 0.5 gram (~1/4 teaspoon) of black pepper
  • 0.5 gram (~1/4 teaspoon) of garlic powder
  • 2 pineapple rings
  • 2 pieces of baby Swiss cheese
  • 2 Kaiser rolls or hamburger buns

Directions

- Knead hamburger, Teriyaki sauce, Lawry’s seasoned salt, black pepper, and garlic together and form in to two patties.

- Barbeque your burgers to your normal desired internal temperature, though I would suggest a nice “medium” that is hot throughout but with a nice slightly pink middle.

- Right before the burgers are done, place a pineapple ring on top of each burger and fill the center of ring with an additional 15 ml of Teriyaki sauce.

- Cover the pineapple with a piece of baby Swiss cheese and let it melt down and seal the pineapple ring to the burger

- Place the Kaiser rolls or hamburger buns on the grill for a few seconds to toast and then serve.
Sunday, January 23, 2011

Honey Wheat Bread

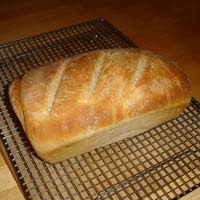
Finished product
I love to eat good bread and recently I have discovered that I actually enjoy making it too. This all started with a falling out I had with my old standby, Grandma Sycamore’s. I used to love Grandma Sycamore's, both their white and their honey wheat.  However, in the past year or so, the quality of the bread has gone down and like so many things the price has gone up by nearly double.

Given this I started my quest to find a good alternative, something that I could start making, and make a hundred or so times to get just right.  I started combing through my baking text books (who knew you could spend nearly 50 pages discussing flour), reading baking blogs, and reading recipes at my favorite recipe site, allrecipes.com. I finally found on allrecipes.com a recipe that looked like it might be a good place for me to start. Obviously I would need to adjust it and tweak to my liking and make adjustments for high altitude.  What I have come up with is the following, enjoy. NOTE: I have tried this in both my 6 quart stand mixer and my 16 cup food processor and have found that it works best in the stand mixer.  Also my stand mixer says to never go above speed 2 for mixing dough.  If yours is different you will need to adjust.

Ingredients – Yeast Start
  • 120 ml warm water
  • 6 grams of white sugar
  • 12 grams of active dry yeast

Ingredients – Bread
  • 1 can (12 fl oz) of evaporated milk
  • 60 ml water
  • 60 ml of honey
  • 60 ml of shortening (Crisco)
  • 12 grams of salt
  • 300 grams of whole wheat flour
  • 500 grams of white bread flour


DirectionsYeast

- Combine the 120 ml of warm water and sugar in small bowl and mix until sugar is dissolved.

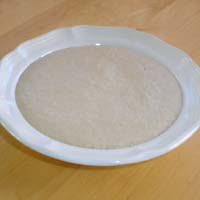
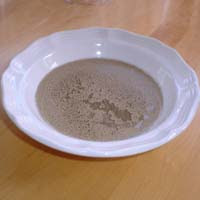
- Add yeast and let stand for 10-15 minutes, or until it is foamy 

- Once the yeast is nearly done, start on the bread mixture

    Yeast just added
    Yeast is ready


    Direction – Bread

    - Melt the shortening in your microwave (less than 60 seconds)

    - Combine 60 ml of water, honey, evaporated milk, melted shortening, salt, and the whole wheat flour in your stand mixer bowl (6 quart)

    - Using the paddle blade, mix this on speed 2 for 30 seconds.

    - Scrape the bottom and sides of the bowl and add the yeast mixture and mix for 30 more seconds on speed 2, once again with the paddle blade.  You should have a mixture that resembles pancake batter consistency.

    - Take the paddle blade off and put the dough hook on

    - Let the mixture rest at room temperature for 10-15 minutes.

    - Add 300 grams of the 500 grams of white bread flour and knead for 1 minute 30 seconds on speed 2

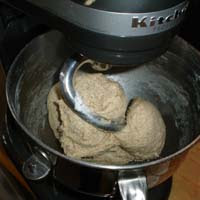
    Dough just about done
    - Continue kneading and add 1 heaping tablespoon of the remaining 200 grams of flour every 5 seconds or so until it is all mixed in.  In this step you will knead for about 4 minutes 30 seconds or for a total of 6 minutes with the dough hook.  NOTE:  If you add the remaining 200 grams of flour to quickly it will make a mess. 

    - Remove the dough from the mixer and place on a lightly floured (white bread flour) table.  Lightly knead by hand (folding out side to center and turning method) for 30 seconds and then make in to a dough ball, spinning the dough in your hands to seal the bottom. 

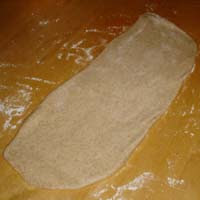
    Rolled out dough
    - Place dough ball in to a large buttered bowl and lightly cover with plastic warp (do not seal it closed) and set aside in a warm place to rise.  It can take an hour or two or three to rise.

    - Once the dough has visibly doubled, remove from bowl and place on lightly floured table (white bread flour) and cut in half or thirds depending on pan size (see below in cooking time section, large pans cut in half, medium sized pans cut in thirds).  Separate the halves and roll out to the width of your bread pans. 

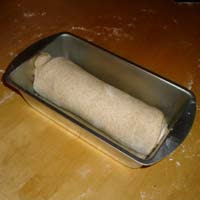
    Start of second rise
    - Roll the dough in to a log and place in a buttered bread pan with the seam side down.  Lightly cover with plastic wrap and let rise again (the second rise).  This rise usually takes less time. (At this point you could wrap the dough log in plastic wrap and freeze instead of putting it in to the bread pan for the second rise.  If you do this you can then treat it like any other frozen bread dough at a later time)

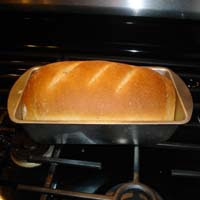
    Out of the oven
    - Once the dough has visibly doubled and filled the pan you can remove the plastic cover, cut the top, and bake it.

    - Bake at 375 degrees for 30 minutes for a large pan (5.5 inch x 9.5 inch x 2.5 inch pan) or 22 minutes for a medium pan (4.5 inch x 8.5 inch x 2.5 inch). I prefer and recommend the large pans.

    - When time is up, remove immediately from pan and place on a cooling rack to cool.  After an hour or so you can put the bread in a bread bag to store. 

      Wednesday, January 19, 2011

      Life is to short to eat crappy food!

      A friend of mine once told me "life is to short to eat crappy food", and I must say I completely agree with him.  I am constantly amazed at how often we as society eat things that are just down right disgusting.  We make attempts to justify the crap we eat and make ourselves feel better by saying it was cheap or it was fast or...?  But it does not matter, it is still crappy food and often not very good for us.

      I wonder, are we as society just apathetic when it comes to what we eat, have we been socialized in to thinking certain foods are good or good for us, or are we just down right lazy and unwilling to either make or eat things that are good?  My guess is that it is a mix of the three.  From my research the general decline in food and the acceptance of crappy food started with the commercial brain washing of the 1950, 60s and 70s.  Do you remember when margarine came with a packet of nuclear yellow dye?  It was sold to us that this was the way of the future.  I also loved the push for "TV Dinners" that were definitely a ploy to get us to spend more time out of the kitchen and in front of the television watching mindless entertainment and making ourselves fat.  When you honestly think about it, none of these prepackaged food back then were good and they surely were not good for us. But we as society were hoodwinked by marketing and the commercialization of "the future" to start eating crappy food.

      Today, I believe that too many people have forgotten or never learned how to cook.  Basic kitchen and cooking techniques are not being learned in the home.  Most recipes, if you can call them that, call for a can of this or a box of that as the main ingredient.  Just as we need to refocus on the family and fix that basic building block, we need to fix what it is we eat and serve in our homes.  People need to really consider what it is they are eating. 

      Over the years I have developed a love of eating and in turn cooking, baking and candy making.  Through this blog I hope to share with you some of my successes and failures I have with the places I eat at and the things I make.  I also hope I can convince you of a simple fact that it is not hard or expensive to eat and cook good food.

      Please note, I am not a tree hugging soil munching druid so I will shop at stores other than Whole Foods (though I love Whole Foods), and yes, I will eat meat with the best of them.  I also have one general snobby rule in my kitchen, it states that if the recipe calls for a can of Campbells anything to be mixed in, that recipe is forthwith given a burning at the stake that would make the Salem witch hunts jealous.

      I hope you enjoy my random posts and find my recipes fun to make.  Please feel free to comment on the recipes with your variations.  Just so you know, all of my recipes are tailored for an elevation of ~1370 meters (4500 feet) above sea level and for a very low humidity climate.  I only use a natural gas range and the oven is NON convection so if your oven is electric, convection, or both, your baking times will be different.