 |
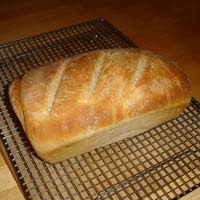
| Finished product |
I love to eat good bread and recently I have discovered that I actually enjoy making it too. This all started with a falling out I had with my old standby, Grandma Sycamore’s. I used to love Grandma Sycamore's, both their white and their honey wheat. However, in the past year or so, the quality of the bread has gone down and like so many things the price has gone up by nearly double.
Given this I started my quest to find a good alternative, something that I could start making, and make a hundred or so times to get just right. I started combing through my baking text books (who knew you could spend nearly 50 pages discussing flour), reading baking blogs, and reading recipes at my favorite recipe site, allrecipes.com. I finally found on allrecipes.com a recipe that looked like it might be a good place for me to start. Obviously I would need to adjust it and tweak to my liking and make adjustments for high altitude. What I have come up with is the following, enjoy. NOTE: I have tried this in both my 6 quart stand mixer and my 16 cup food processor and have found that it works best in the stand mixer. Also my stand mixer says to never go above speed 2 for mixing dough. If yours is different you will need to adjust.
Ingredients – Yeast Start
- 120 ml warm water
- 6 grams of white sugar
- 12 grams of active dry yeast
Ingredients – Bread
- 1 can (12 fl oz) of evaporated milk
- 60 ml water
- 60 ml of honey
- 60 ml of shortening (Crisco)
- 12 grams of salt
- 300 grams of whole wheat flour
- 500 grams of white bread flour
Directions – Yeast
- Combine the 120 ml of warm water and sugar in small bowl and mix until sugar is dissolved.
- Add yeast and let stand for 10-15 minutes, or until it is foamy
- Once the yeast is nearly done, start on the bread mixture
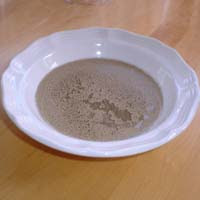 |
| Yeast just added |
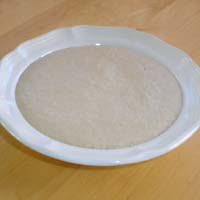 |
| Yeast is ready |
Direction – Bread
- Melt the shortening in your microwave (less than 60 seconds)
- Combine 60 ml of water, honey, evaporated milk, melted shortening, salt, and the whole wheat flour in your stand mixer bowl (6 quart)
- Using the paddle blade, mix this on speed 2 for 30 seconds.
- Scrape the bottom and sides of the bowl and add the yeast mixture and mix for 30 more seconds on speed 2, once again with the paddle blade. You should have a mixture that resembles pancake batter consistency.
- Take the paddle blade off and put the dough hook on
- Let the mixture rest at room temperature for 10-15 minutes.
- Add 300 grams of the 500 grams of white bread flour and knead for 1 minute 30 seconds on speed 2
 |
| Dough just about done |
- Continue kneading and add 1 heaping tablespoon of the remaining 200 grams of flour every 5 seconds or so until it is all mixed in. In this step you will knead for about 4 minutes 30 seconds or for a total of 6 minutes with the dough hook. NOTE: If you add the remaining 200 grams of flour to quickly it will make a mess.
- Remove the dough from the mixer and place on a lightly floured (white bread flour) table. Lightly knead by hand (folding out side to center and turning method) for 30 seconds and then make in to a dough ball, spinning the dough in your hands to seal the bottom.
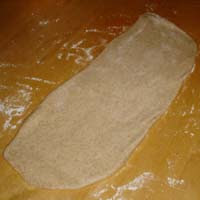 |
| Rolled out dough |
- Place dough ball in to a large buttered bowl and lightly cover with plastic warp (do not seal it closed) and set aside in a warm place to rise. It can take an hour or two or three to rise.
- Once the dough has visibly doubled, remove from bowl and place on lightly floured table (white bread flour) and cut in half or thirds depending on pan size (see below in cooking time section, large pans cut in half, medium sized pans cut in thirds). Separate the halves and roll out to the width of your bread pans.
 |
| Start of second rise |
- Roll the dough in to a log and place in a buttered bread pan with the seam side down. Lightly cover with plastic wrap and let rise again (the second rise). This rise usually takes less time. (At this point you could wrap the dough log in plastic wrap and freeze instead of putting it in to the bread pan for the second rise. If you do this you can then treat it like any other frozen bread dough at a later time)
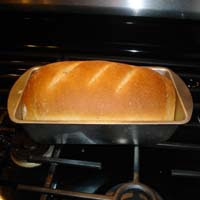 |
| Out of the oven |
- Once the dough has visibly doubled and filled the pan you can remove the plastic cover, cut the top, and bake it.
- Bake at 375 degrees for 30 minutes for a large pan (5.5 inch x 9.5 inch x 2.5 inch pan) or 22 minutes for a medium pan (4.5 inch x 8.5 inch x 2.5 inch). I prefer and recommend the large pans.
- When time is up, remove immediately from pan and place on a cooling rack to cool. After an hour or so you can put the bread in a bread bag to store.


